
Overhead Squat Assessment: Why and How to Do It
Author:
Reviewed by:
(21 years of Oly Lifting experience)
Unlock your full potential by engaging with our experts and community! Have questions about your fitness journey or looking for expert advice on weightlifting techniques? Don’t hesitate — leave a comment below and Zinaida Bondarenko will provide a personalized answer and insights to help you reach your goals.
Torokhtiy is reader-supported. Some links are affiliate links, and we may earn a commission at no extra cost to you. See our disclosure page for details.
As a trainer, it’s important to know your client’s level before prepping a plan on how to help them improve. One of the most effective ways to do this is the overhead squat assessment. You might be wondering why this is important because you think you already know what they need. Perhaps you understand why it’s important, but can’t seem to figure it out. Whatever your point of confusion, I’m here to help.
Let’s start with the short answer…
An overhead squat assessment is important because it helps you understand the kinetic chain health of your client. You understand exactly what their deficiencies are so you can come up with the best program for them.
If you’d like to know more about it, continue reading.

Overhead Squat Assessment: a General Description
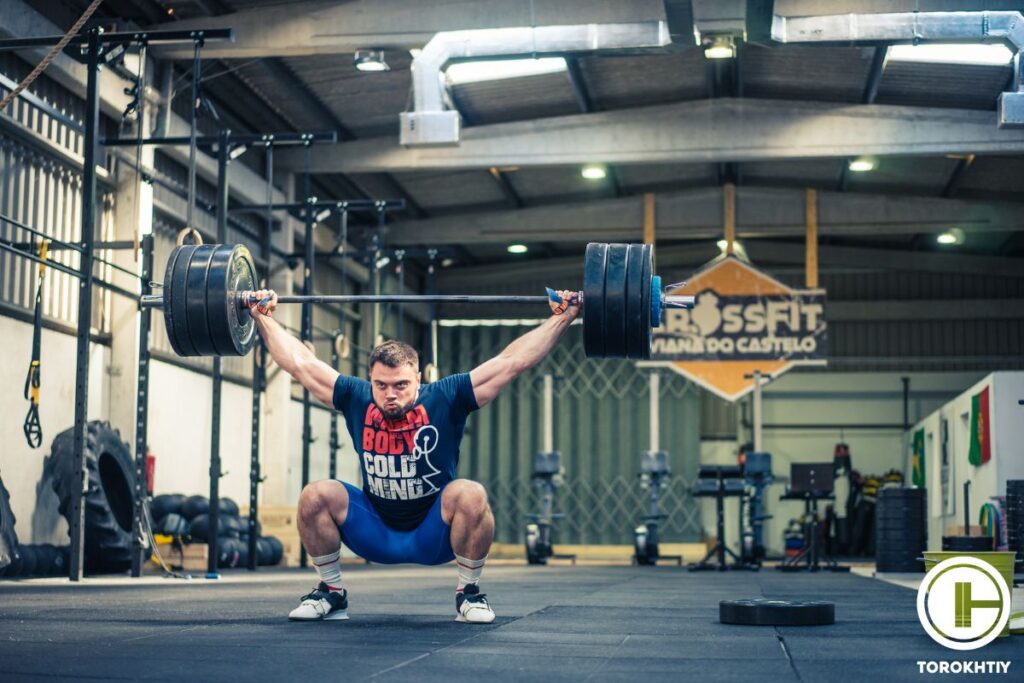
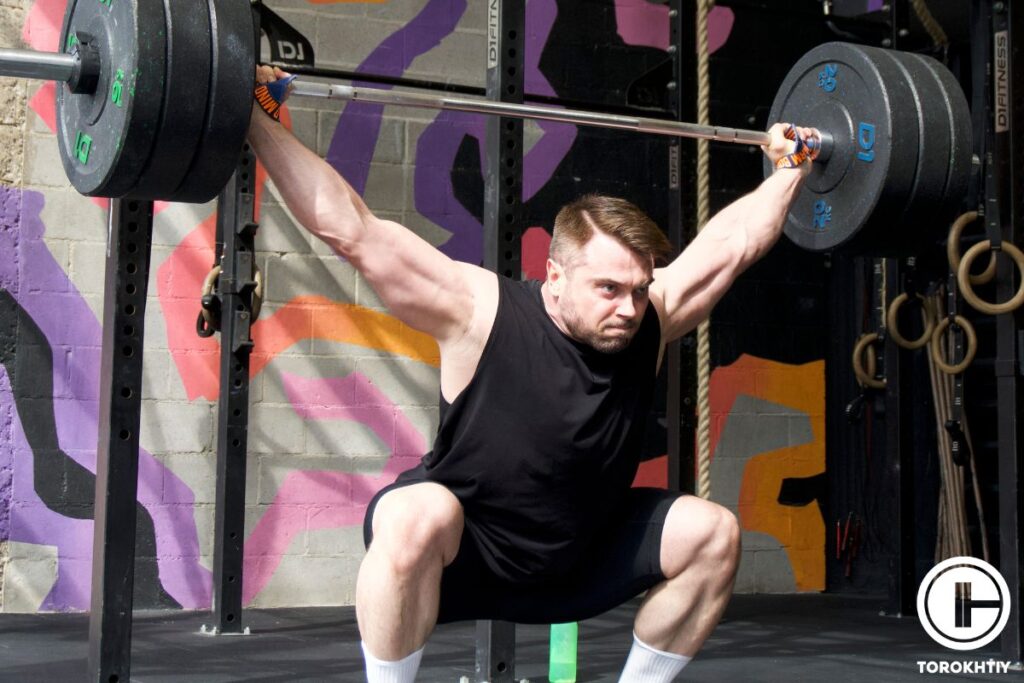
Overhead squat assessment, also called OHS assessment, is an effective test that helps you find any movement dysfunctions and muscle imbalances. The overhead squat is straightforward to learn. It simply involves performing a regular squat with the arms stretched overhead. A person with high fitness or experience levels could add some intensity to the workout by holding a barbell as they squat.
When done correctly, an overhead squat is an effective way to target muscles all over your body. It improves your flexibility, strength, and mobility. It’s also a great way to test one’s kinetic chain.
The overhead squat is awesome for this test because it involves a complete range of movements. If mobility in any joint is limited, you’ll see it in the workout. If there’s some muscle imbalance, you’ll notice it from their workout. Things like these help you understand exactly what your client’s problem is and how you can help them.
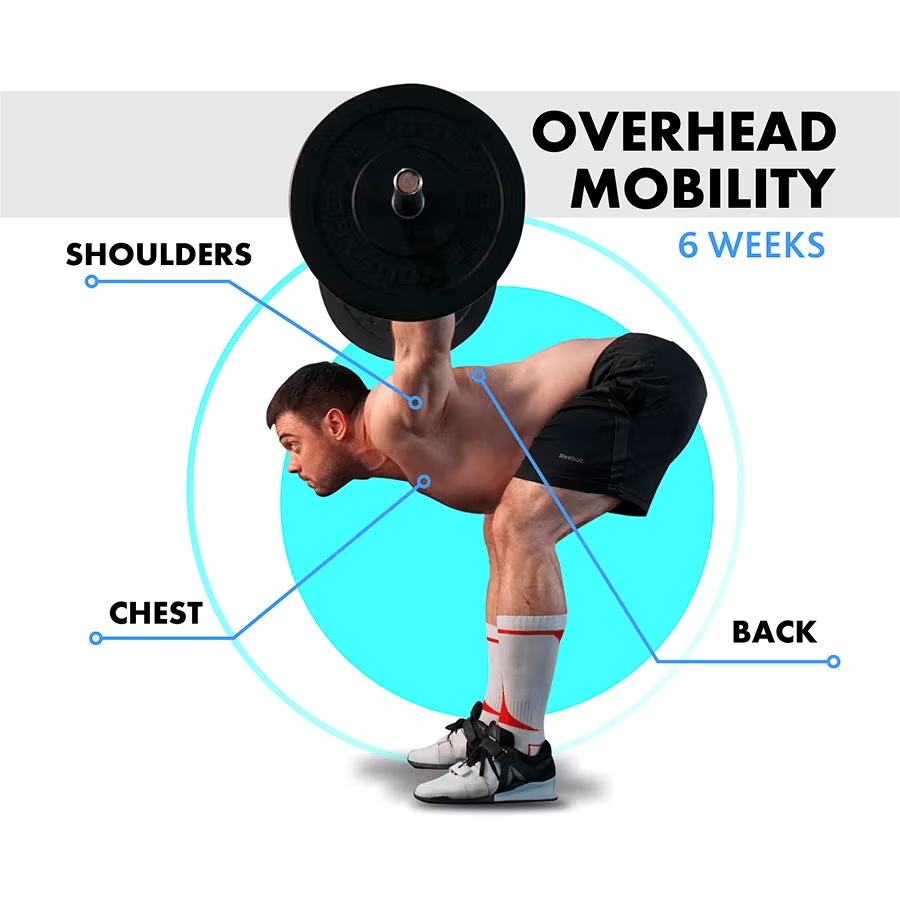
🔻OVERHEAD MOBILITY CYCLE Program
Boost Your Overhead Mobility!
Pro or beginner, our Overhead Mobility Program is your key to success.
Why Choose?
- 🏋️ Master Olympic weightlifting, from beginner to pro.
- 💪 Boost upper body mobility and joint strength.
- 🚀 Solidify your confidence in overhead movements.
- 🥇 Achieve new personal bests.
- 🎯 Benefit from 60+ unique exercises.
- 📈 5 tests to track your progress.
- ⏰ 18 efficient 30-minute workouts.
- 📹 120 video guides.
- 🔒 Lifetime access for success anytime, anywhere.
Don’t wait – unlock your potential today! 🚀
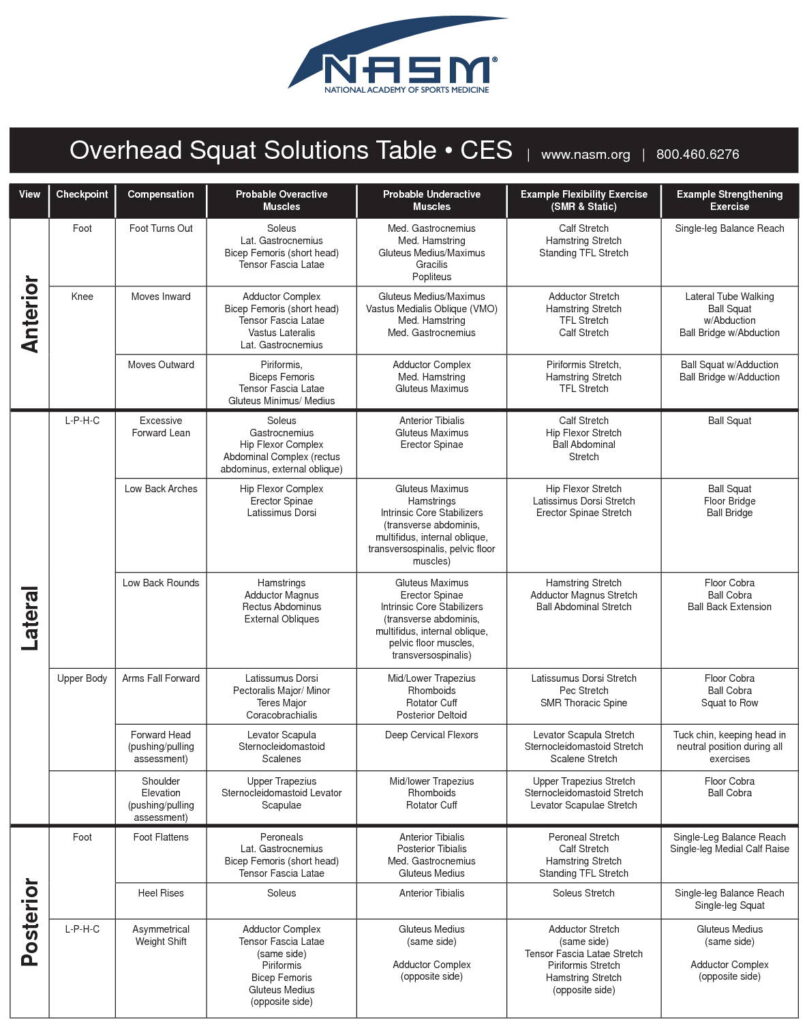
Overhead Squat Assessment Chart
It’s one thing to do a test and another thing to interpret the results correctly. You might be wondering how you would use the OHS assessment to come up with solutions. I have good news in that regard. The National Academy of Sports Medicine has a chart you can use to effectively interpret your assessment test results and even come up with solutions to the observed issues. Have a look at the overhead squat assessment chart.
Three Viewpoints of the Overhead Squat Assessment
The anterior view simply means from the front. Observe the workout from the front and take some notes. Your major points of observation in this view are the foot and knee of your client. You want to check whether their feet and knees shift position as they workout. Again, the chart helps guide you on what to look out for and how you can help them solve it.
1. The Anterior View
Stand up straight and extend your arms to the side horizontally to the ground. Keeping your torso still, hips, and legs still, slowly rotate your spine from left to right. Try rotating further as you get more comfortable. To activate the upper spine, turn your head towards the side you’re rotating to and look at your arms.
For maximal effect, always keep your gaze locked on your hand as you rotate.
The final goal is to be able to rotate your spine so that your upper naturally turns fully sideways to a nearly 90-degree angle.
2. The Lateral View
As the name implies, observing from the lateral view involves observing the workout from the side. This opens you up to an angle you didn’t have with the anterior view. The major points of observation here are the back and upper body. You want to make sure their back is straight and in good form. You also need to check their arms and shoulders to ensure their form is impeccable. Of course, if they’re coming to you for help, odds are they don’t have the best of forms. This test helps you expose those flaws so you can effectively deal with them.
3. The Posterior View
Finally, we have the posterior view, and I think it’s safe to assume you know it involves observation from behind. Again, you get a different angle to observe from so you can get a complete picture of what’s going on. In this anterior view, pay close attention to the heel to make sure they can keep balance without the foot flattening or the heel rising. You also want to ensure there’s no asymmetrical weight shift tilting the body to one side. Like with the other views, the NASM chart has a complete guide for you.
Follow us!
Free!
Get a 2-week Weightlifting Program as a bonus for the subscription to kickstart your training plan!
Free!
Common Observations During the Squat Assessment
I already mentioned them before, but here are some key points you want to take note of during your test. These are key points that will not only affect your client’s ability to perform the squat effectively, but nearly every other workout.
1. Foot Form
Foot form might seem like something small and inconsequential, but the foot is where it all starts from. So if an athlete gets it wrong there, imagine how much more could go wrong. Observe the feet to make sure there’s no shifting inward or outward.
If it’s shifting outward, the NASM chart recommends exercises like the calf stretch, the hamstring stretch, and the single leg balance reach.
2. Knee Form
As with the foot form, the knee should also be straight and true. Any shifting inward or outward means there’s a problem you might want to check out. It could mean there are some underactive or overactive muscles at work.
If the knee moves inward, it means there are some underactive muscles and some overactive muscles. Some exercises you can use to correct this include ball squats, calf stretches, and lateral tube walking.
3. LPHC
LPHC, or lumbo pelvic hip complex, operates around the lumbar spine and pelvis, two regions of the body that have a huge impact on the bodily structures above and below them. The upper and lower back, waist, and core all form part of the LPHC region and you know how important these parts are to any workout.
LPHC issues can manifest as excessive forward lean, an arched or rounded back, or an asymmetrical weight shift. They are especially important because they’re usually the toughest to correct. You can find some recommended exercises on the chart.
4. Arm Position
Are the arms overextended? Are they falling forward? Do they follow a straight line from your back? These are all observations to be made that will inform how you proceed to help them.
Overhead Squat Assessment Tips
You want your overhead squat test to move smoothly so that you can make the necessary corrections. Otherwise, the entire assessment will be wasted effort. To help you get that, here are some tips.
1. Use the NASM chart
The National Academy of Sports Medicine has provided a chart to guide you on what to look out for, what issues may be causing the lack of form, and how to solve them. As a trainer, you would be cheating yourself if you just ignore the chart. It’s a guide for you, so use it. Without the guide, you’re more likely to fall into trouble except if you’re super experienced in this field.
2. Have Them Remove Their Shoes
Shoes can mask quite a number of issues, especially in the foot. It’s advised that you get your client to take off their shoes so you can see their form in its most bare form. Taking off their shoes will expose all you need to make an effective diagnosis and plan appropriately.
3. Train Newbies
Sometimes, your client might not even know how to do a squat. They might be getting form or technique wrong not necessarily because of any kinetic chain issues, but because they don’t know how to do a squat. When you notice this, you’ll need to train them on how to perform an overhead squat properly.
FAQ
What Does the Overhead Squat Assessment Measure According to Nasm?
The NASM overhead squat assessment is a test that measures the kinetic chain of an individual. It provides an idea of one’s dynamic posture and body mobility. It helps expose muscles that could be overactive or underactive to give a trainer a better idea of what is really needed.
What Does Elevating the Heels Do During an Overhead Squat Assessment?
When doing an overhead squat, elevating your heel reduces mobility requirements on the ankle and hips and allows you to sink into a deeper squat than usual. During the overhead squat test, however, an elevated heel might mask some underlying issues. I would advise using a normal squat instead of an elevated heel squat for the test.
Why Elevate Your Heels When Squatting?
As I have previously said, elevating your heel during a squat reduces the mobility requirements on your ankle and hips. So if you have tight hips or some ankle restriction, elevating your heel will allow you to do your squat regardless.
Conclusion
For athletes and fitness enthusiasts, the NASM overhead squat assessment is an awesome way to figure out exactly what mobility issues you might have and how to fix them. For trainers, it gives you a clear insight into your client’s needs and how to serve them best. Refer to the chart to find out the possible overactive and underactive muscles, and the recommended exercises to handle them.
That’s enough talking from me. Have you ever done or administered an overhead squat test before? Which issue do you think you might have? Did I skip anything? I’ll be in the comments to hear you out.
Also read:
- Upper Body Stretch
- Lower Back Mobility Exercises
- Overhead Squat
- Tricep Stretches
- Shoulder Mobility Exercises
- Squat Stretches
- Trapezius Stretches
References:
- The Overhead Squat: What Is It Good For? // Bodybuilding: https://www.bodybuilding.com/content/the-overhead-squat-what-is-it-good-for.html
- THE OVERHEAD SQUAT ASSESSMENT // Fitness Trainer Academy: https://www.thefitnesstraineracademy.org/blog/the-overhead-squat-assessment/
- How to Do an Overhead Squat: Proper Form, Variations, and Common Mistakes // Very Well Fit: https://www.verywellfit.com/how-to-do-an-overhead-squat-4685854
- Assessment of lumbopelvic–hip complex instability and segmental sequencing amongst softball athletes // National Library of Medecine: https://www.ncbi.nlm.nih.gov/pmc/articles/PMC7857469/#gid
Why Trust Us?
With over 20 years in Olympic weightlifting, strength training, nutrition coaching, and general fitness our team does its best to provide the audience with ultimate support and meet the needs and requirements of advanced athletes and professional lifters, as well as people who strive to open new opportunities and develop their physical capabilities with us.
By trusting the recommendations of our certified experts in coaching, nutrition, and sports training programming, as well as scientific consultants, and physiotherapists, we provide you with thorough, well-considered, and scientifically proven content. All the information given in the articles concerning workout programming, separate exercises, and athletic performance, in general, is based on verified data.
The product testing process is described in more detail here.

Author: Zinaida Bondarenko
Coach, Physiotherapist
Physical rehabilitation experience: 10 years
Zinaida was a member of the national team of Ukraine in rhythmic gymnastics, accumulating 15 years of professional sports experience. She holds certifications in functional training, rehabilitation, kinesiotherapy, specializing in working with athletes across various domains: recovery, rehabilitation, functional and mobility training, General Physical Preparedness (GPP), as well as injury prevention through specific program design. Moreover, she focuses on athlete and coach education to enhance performance and prevent injuries.
Reviewed by: Oleksiy Torokhtiy
Olympic Weightlifting Champion, PhD in Sport Science
Best Results: Snatch – 200 kg,
C&J – 240 kg
Oleksiy Torokhtiy is a professional athlete boasting 20 years of experience in Olympic weightlifting. With multiple European and World titles under his belt, he has showcased his prowess in two Olympic Games (Beijing 2008 and London 2012). Upon concluding his illustrious career, Oleksiy dedicated himself to coaching. By 2022, he had conducted over 200 weightlifting seminars worldwide. He is the visionary behind an international sportswear and accessories brand known for its motto, “Warm Body Cold Mind.” Additionally, he is an esteemed author and the creator of a series of training programs and eBooks.
Still have questions after reading our article? Unlock your full potential by engaging with our experts and community! Don’t hesitate — leave a comment below and Zinaida Bondarenko will provide a personalized answer and insights to help you reach your goals.