
How to Do a Wall Handstand: 6 Tips to Progress Your Performance
Author:
Reviewed by:
(21 years of Oly Lifting experience)
Unlock your full potential by engaging with our experts and community! Have questions about your fitness journey or looking for expert advice on weightlifting techniques? Don’t hesitate — leave a comment below and Oleksiy Kononov will provide a personalized answer and insights to help you reach your goals.
Torokhtiy is reader-supported. Some links are affiliate links, and we may earn a commission at no extra cost to you. See our disclosure page for details.
When it comes to gymnastics or yoga-related exercises, most people start getting nervous about doing some unusual movements and trying new positions that require good stretching and flexibility. Speaking about handstands, they’re getting scared about how to do a wall handstand without strains and hand fractures. However, there’s nothing frightening. Consistency, regularity, and practice are key points in gaining success with handstands.
In this overview, you’ll get to know features, benefits, and essential tips on how to do a wall handstand in a short time without getting injured.
Wondering how to do a wall handstand without injuries? It’s quite clear: walk as close as possible to the wall and push yourself up, with your legs directed to the ceiling. With each training, prolong each rep by moving away from a spotter gradually to do a freestanding handstand hold.

Why Are Wall Handstands Important?
Being an advanced bodyweight exercise when you stand upside down on the hands against the wall, it’s a simple (at least theoretically) and great training for the whole body that involves your upper body and core to keep you balanced. It’s also common for gymnastics to build general strength and achieve maximum body coordination in reversed position.

Stop thinking that gymnastics basics are essential for performing these exercises easily. Moreover, if you lack gymnastics or yoga practice that doesn’t mean you won’t succeed to do handstands.
Regular practicing handstands on the wall will result in superb results: you’ll train your handstand hold, shoulder strength, and boost core endurance to be able to keep your body straight against the wall, without tilting the legs back and forth, and to the sides. There’s nothing frightening in doing wall-assisted handstands since you’ll learn to keep balance and concentration, build your upper body, and also get some mental benefits, i.e., reload the mood and mind by meditating a bit while standing upside down.

Physical Benefits
Being a great isometric exercise, handstands help to promote core strength and regulate blood and lymph circulation. Regular exercise performance can increase muscles, boost bone health, heart, brain, and lungs, as well as managing your psychological state. Let’s observe how you’ll benefit from adding handstands to your everyday training routine.
1. Developing Upper Body Muscles
To perform handstands you need strong shoulders and arms that will keep you straight upside down. Also, upper back muscles, i.e., lats, traps, and deltoids, should be well-developed to act as a spotter and support you while exercising. To promote your upper body power, you should practice holding a handstand for several seconds at the beginning, by increasing the time gradually to be able to hold yourself in this position for one minute at least.
2. Improving Balance
Handstanding enhances your balancing skills and body coordination to be able to concentrate for some time and hold yourself in a reversed position. Overally, it’s quite difficult to make slight adjustments and control your muscles to keep the balance not to fall occasionally.
3. Enhancing Core Muscles
As you stand upside down you need to stabilize your muscles. Besides strong shoulders and arms, the abdominal muscles are also involved to keep you stay in such a stable position for some time. Moreover, some lower body muscles also work during handstands: hamstrings, inner thigh muscles, hip flexors, and lower back. If doing handstands regularly, you’ll work your core well.
4. Maintaining Bone Health, Circulation And Breathing
Since it’s an exercise with personal weight, it can help to strengthen bone health in the upper body and spine. Standing with your head down, this exercise will boost blood circulation in your lungs by stretching the diaphragm. So, you can also improve your aerobic capabilities.
5. No Extra Pressure When Blood Flows To The Upper Body
When you turn upside down, the vessels of the legs start flowing with gravity, but not against it when standing. There’s no tension when the blood flows from your legs to your upper body. So, it’s beneficial for your body in general. The thing is that the legs are always below the rest of the body, and the blood circulation creates extra tension to reach the lungs, heart, and brain cells.
6. Improving Gastrointestinal System
Handstands help to release stuck substances and increase blood flow to our bowel that is subjected to tension and gravity when standing upside down. With correct blood circulation, there’ll be excellent absorption of nutrients and better digestion. It also promotes the process of cleaning the cells from toxins by stimulating the lymphatic system.

Mental Benefits
1. Lift Up Your Mood
This exercise can improve your mood because as the blood reaches the brain, it refills the cells, energizes, and calms the organism, in stressful situations mainly. Handstands also mitigate cortisol production which is the stress hormone and lower the feel of anxiety and sadness. Some researchers advise combining handstands with breathing exercises and having some kind of meditation.
2. Improving Endocrine And Immunity Systems
Our brain releases hormones called endorphins that enhance our mood to make us happier and out of stress. This also relates to the blood flow as it oxygenates the cells and increases the heart muscle. Hence, if performing handstands daily, you can protect your mind against depression and increase your immunity.
How To Do A Wall Handstand: A Step-By-Step Progression And Recommendations
If you finally decide to learn how to do a wall handstand, you should follow the instructions meticulously to keep the right form and technique.
So, if you want to learn to hold a wall handstand, then let’s observe a step-by-step progression of the back-to-wall handstand:
- You need to get into the pike position in front of the wall. Place your hands on the floor 6”-8” in front of the wall.
- Next, elevate your shoulder blades and press onto the floor with your chest muscles, namely the serratus anterior.
- Then, reach one leg straight back while the other leg stays on the floor.
- Here is an important moment: try to hop up carefully into the reversed position. You need to feel enough stability and strength to keep your body inverted. Honestly, for some people, this step may take days and even weeks of practice.
- Continue pressing onto the surface with your chest, by keeping the glutes squeezed and tight core, thighs, and calves. So, congratulations, you’re already upside down in the handstand position.
- Return to the initial position gradually.
If you’re well-trained and the handstand exercise doesn’t make you feel anxious, then do it with your face away from the wall. Place your hands wide, spacing them apart, and hop up into hand standing. Hold this position for 1 minute. As you progress, try not to use the wall as a spotter, but perform it independently.
1. Keep The Right Grip
Before hopping up the handstand position, press your fingertips to the floor as if you grip it. Don’t keep them flat. Practice your grip in a plank, or downward dog position.
2. Shoulders Are In Line With Your Wrists
It’s a mistake when people place their hands too wide. Instead, your shoulders, arms, and palms should be in one line. Keeping such a position will enable you to balance better and you’ll succeed in holding the position longer. To build muscle memory, try to keep your hands under the shoulders by doing planks and downward dog facing with your belly to the wall.

3. Keep Your Body Stacked
To keep proper balance the whole body should be stacked: shoulders above the hands, hips above the shoulders, and heels above the hips. Try this position near the wall by keeping such handstand positions, i.e., L-position, straight with knees bent to the ribcage, or simply straight along the wall. Hold your body weight in line to avoid falling, try not to keep your body too forward or backward.
4. Keep Your Hands Bouncing
You shouldn’t fix your arms when standing straight upside down. It’s better to keep your arms and elbows soft and a little bit bouncing. With slightly flexible arms, you’ll be able to maintain balance for a long time.
5. Keep Your Glutes And Legs Tight
You should squeeze your glute muscles from the very start when hopping up the handstand position. By squeezing the glutes, you’ll be able to maintain stability and balance. Although, for some people, it may look challenging to focus on the glutes squeezed when standing upside down. Additionally, don’t forget to keep your legs as close together and tight as possible. Over time you’ll learn to keep the position with pressed glutes and it’ll be easier to hold it for a longer period.
6. Activate Your Abdominals
A perfect stance is a straight body, with a flat back and tight core. It’ll help to keep your body upright without arching your back and sloppy legs.

Risks Of Doing Wall Handstands
Despite dozens of advantages of this exercise, hand standing can cause severe health issues, especially for those people who aren’t physically prepared. It’ll be pretty challenging for people who don’t train regularly and suddenly decide to perform handstands. Here’s the list of the most common risks and drawbacks you may face when doing the exercise.
1. It Can Be Dangerous
If you don’t know how to do a handstand on the wall and how to keep the proper form, unfortunately, your first attempts can result in falling down. Because of not knowing how to regroup instantly, you can hurt yourself. So, be attentive, listen to your body to prevent such cases, and always train in new exercises in safe places with a cushioned floor.
2. Сan Increase Pain In Ligaments
If you have joint pain, doing handstands can only aggravate your problem because all the tension goes to your wrists. Before starting handstanding, visit your doctor to receive recommendations.
3. Get Muscle Discomfort
Since previously you didn’t practice handstanding regularly, after several attempts to perform this exercise may result in soreness and stiffness in muscles. That’s also because your muscles get strained and your body is in an unusual position.
4. Aggravate Already Existing Health Issues
In case you have high blood pressure, eye issues, shoulder or spine problems, you’d better refrain from doing this gymnastics exercise. As you stand upside down, all the pressure comes to the upper body, causing higher tension in your head. Also, all the weight goes to your upper back, arms, and shoulders which can result in worsening your issues.
Follow us!
Free!
Get a 2-week Weightlifting Program as a bonus for the subscription to kickstart your training plan!
Free!
How To Improve Your Wall Handstands
If you’re new to hand standing, the first thing before starting to do this exercise is to create a safe environment with enough space for practice. Find a place near a wall that will act as a spotter for you and adhere to the following exercises for a wall handstand progression without getting hurt yourself.
1. L-Shape Or Downward Dog Handstand Near The Wall
This exercise will help you to get used to the inverted position. You’ll be able to keep your hips stacked with the shoulders and arms. You should learn to push your hips back with bent knees. Hold a good grip and start pushing yourself off the floor with your hands. Step one foot on the wall, then put the other one, and start straightening them gradually without losing the balance. Place your palms closer to the wall and try to hold this position for several seconds.
An alternative for this exercise is the same L-shape stance but with one leg on the wall. It will help you to learn to keep balance and make your muscles get accustomed to such loads.
2. Scissor Kicks Against The Wall
Come into a plank position by gripping the floor firmly with your fingertips. Keep shoulders and palms stacked in line, with elbows straight. Step one leg forward to your hands, and keep your core tight. When you’re ready to handstand, straighten the leg as you jump with the front foot off the ground. Use the other leg to get the momentum and lift it by keeping straight, so the whole body is in one vertical line.
However, this exercise can be quite complex for beginners. To simplify it a bit, you can take stable blocks or several books you’ll place under your palms or feet. It’ll help to get you up by taking some force you need to put in while pushing yourself. Or simply take a chair to help you gain momentum.
3. Front-To-Wall Handstanding
Here you start with an L-shaped position, walking with your feet on the wall until you’re standing straight. Walk your hands towards the wall until your legs are fully straight and make the toe tips close to the wall. Keep your feet together and your glutes and thighs tight. Also, keep your back flat and lift your shoulder blades towards your ears. This position can help you with strength and endurance building.
Can Children Do Wall Handstands?
Generally, children are less fearful of doing such gymnastics exercises like handstanding because they treat it as a game and entertainment. They don’t think of falling and hurting themselves, and don’t consider all complexities and risks. Toddlers see handstanding as a fun time-spending, but not as an exercise when you need to get into a reversed position and be able to hold your weight.
It’s also easier for children to learn this exercise. If you want to teach your child to do handstands on your own, you just need to arrange a safe space with an extra padding surface and guide a child while doing this exercise. You can support them, and hold their calves to help them get used to staying in an inverted pose. But, if your child attends some gymnastics classes, handstanding is a regular position children perform to improve their flexibility and agility.
🔻21-DAY HANDSTAND CHALLENGE
Master Your First Handstand in 21 Days!

This program will help you to:
- ✅ Perform the Handstand Without a Wall
✅ Overcome Your Fear
✅ Master the Technique of Entering the Handstand
✅ Strengthen Shoulders and Core Muscles
✅ Improve Coordination, Balance, and Stabilization
✅ Have Fun: Enjoy the process
☀️Designed by a Cirque du Soleil Artist, Exclusively for You. Use it!
Can You Do Wall Handstands If You Are New To Gymnastics?
Yes, if you have never tried gymnastics or even haven’t attended yoga or stretching classes, it won’t be a big problem to do wall handstands. Sure, better flexibility and stretching will benefit you as your muscles are already ready for such exercises. You won’t feel great muscle stiffness and you won’t get injured or get strains because your body is ready for such training.
It’ll be much easier to perform handstands if you train regularly. Strong upper body and core muscles will be a great privilege: you’ll be able to control your muscles in reversed position and generally will be able to keep balance easier.
So, if you feel enough strength in your arms, shoulders, and abs, and you’re ready to reverse yourself, then give it a try. It’s better to start by practicing an L-stand at the wall. This wall handstand variation involves your legs and core for better support and stability.
Also, if you feel confident you can maneuver by lifting one leg to the ceiling and the other left on the wall. It’s important to keep the straight line, so the whole body is stacked that keeps you from falling.

FAQ
Are Wall Handstands Effective?
Yes, this exercise is effective for building strong upper body, namely shoulders, arms, upper back muscles, i.e., deltoids, lats, and traps, and also works out the abdominal muscles. Handstading is also helpful to improve your balance, coordination, and flexibility.
Are Handstands Against A Wall Hard?
Generally, handstands against the wall aren’t as difficult as it can seem, it’s an exercise of a moderate complexity. It requires strong arms and shoulders that will keep you balanced in the upside down position. Your core muscles should be toned to stabilize your body in the reverse position, and also a good flexibility skills and sense of balance will be extra perks to perform it without hassle.
How Long To Hold A Wall Handstand?
If you’re a beginner, 15-20 seconds will be enough for you to hold a handstand. It’s recommended to start with short tries to get used to such a position and maintain proper body pose. More advanced people who train regularly can try to handstand for 30 seconds with 3 sets, and increase it to 1 minute or more, with more sets accordingly.
Conclusion
With such a detailed guide on how to do a wall handstand, its advantages and disadvantages, we’re sure you’ll succeed in performing this exercise in a short time even without specific skills in gymnastics. Try out to do the above-mentioned exercises to skill up at handstanding and learn to hold a balance.
This exercise will help you to build stronger arms and shoulders, strengthen your abs and make you fitter. But, still, some questions matter to you? Don’t be silent and ask us directly right below the article. You’ll get more insights on how to hop up and hold your body steadily for a longer time.
Also read:
- Side Splits
- How to Do the Splits in 30 Days
- How to Do a Press Handstand
- How to Hold a Handstand for a Long Time
- Can Anyone Do the Splits
- Benefits of Handstands
References:
- Dynamics of expertise level: Coordination in handstand // ScienceDirect: https://www.sciencedirect.com/science/article/abs/pii/S0167945708000808
- Case Report: Passive Handstand Promotes Cerebrovascular Elasticity Training and Helps Delay the Signs of Aging // NCBI: https://www.ncbi.nlm.nih.gov/pmc/articles/PMC9086612/
- Balance control strategies during perturbed and unperturbed balance in standing and handstand // NCBI: https://www.ncbi.nlm.nih.gov/pmc/articles/PMC5541526/
- Bidirectional causal control in the dynamics of handstand balance // NCBI: https://www.ncbi.nlm.nih.gov/pmc/articles/PMC7801474/
- Relationship between postural control and muscle activity during a handstand in young and adult gymnasts // ScienceDirect: https://www.sciencedirect.com/science/article/abs/pii/S0167945717307947
- Photos by Serhii Yevdokymov, Canva.com; Izf, Canva.com; lagunaguiance, Canva.com; AscentXmedia, Canva.com; SimonSkafar, Canva.com.
Why Trust Us?
With over 20 years in Olympic weightlifting, strength training, nutrition coaching, and general fitness our team does its best to provide the audience with ultimate support and meet the needs and requirements of advanced athletes and professional lifters, as well as people who strive to open new opportunities and develop their physical capabilities with us.
By trusting the recommendations of our certified experts in coaching, nutrition, and sports training programming, as well as scientific consultants, and physiotherapists, we provide you with thorough, well-considered, and scientifically proven content. All the information given in the articles concerning workout programming, separate exercises, and athletic performance, in general, is based on verified data.
The product testing process is described in more detail here.
Author: Oleksiy Kononov
Former Cirque Du Soleil Artist
Ukrainian Gymnast
More than 25 years ago Oleksiy started his sports career. He major in gymnastics which is definitely not an easy sport to go in for!
To become an athletic champion (in Ukraine, for instance, we mean here the title of “Master of Sports”) in gymnastics, one needs to spend at least 10 years and start training no later than being six years old. As for Oleksiy, he has fulfilled all the criteria.
During this period of time, definitely not short, he managed to become:
- Master of Sports, Champion of the State and International Tournaments;
- Member of the national team of Ukraine, having a perfect opportunity to train the best team ever!
- Part of Cirque Du Soleil team (as an artist).
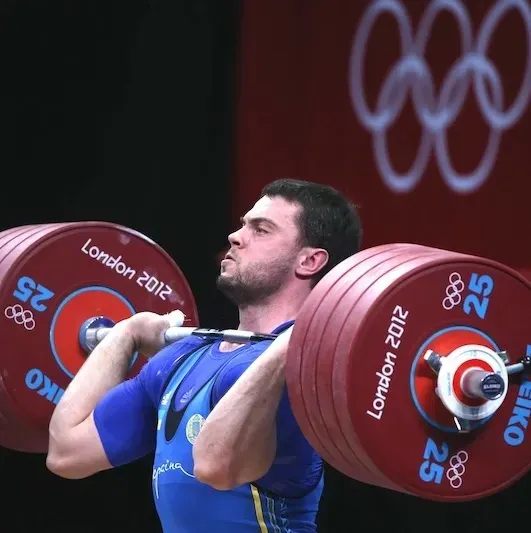
Reviewed by: Oleksiy Torokhtiy
Olympic Weightlifting Champion, PhD in Sport Science
Best Results: Snatch – 200 kg,
C&J – 240 kg
Oleksiy Torokhtiy is a professional athlete boasting 20 years of experience in Olympic weightlifting. With multiple European and World titles under his belt, he has showcased his prowess in two Olympic Games (Beijing 2008 and London 2012). Upon concluding his illustrious career, Oleksiy dedicated himself to coaching. By 2022, he had conducted over 200 weightlifting seminars worldwide. He is the visionary behind an international sportswear and accessories brand known for its motto, “Warm Body Cold Mind.” Additionally, he is an esteemed author and the creator of a series of training programs and eBooks.
Still have questions after reading our article? Unlock your full potential by engaging with our experts and community! Don’t hesitate — leave a comment below and Oleksiy Kononov will provide a personalized answer and insights to help you reach your goals.